The holiday season is a magical time, filled with warmth, family, and, of course, incredible food. While the thought of preparing a show-stopping dessert might seem daunting amidst all the festive hustle, imagine a dessert that not only embodies the spirit of the season but can also be largely prepared in advance, freeing you up to enjoy the celebrations. Enter the chocolate candy cane cake recipe – a classic that perfectly marries the rich indulgence of chocolate with the refreshing zest of peppermint, delivering a truly unforgettable experience.
For many, this cake isn't just a dessert; it's a cherished tradition. The aroma of rich chocolate mingling with crisp peppermint, the vibrant red and white sprinkles on a fluffy white frosting – it’s the essence of Christmas magic on a plate. This article will guide you through creating this festive delight, with a special focus on expert make-ahead tips that will ensure your holiday entertaining is stress-free and delicious.
The Enduring Appeal of a Chocolate Candy Cane Cake for Holiday Entertaining
There's something inherently festive about the combination of chocolate and peppermint. It evokes childhood memories of candy canes on Christmas trees and rich hot cocoa by the fire. A chocolate candy cane cake captures this essence beautifully. Its dark, moist crumb provides the perfect canvas for a burst of cool peppermint, creating a harmonious balance of flavors that delights the palate.
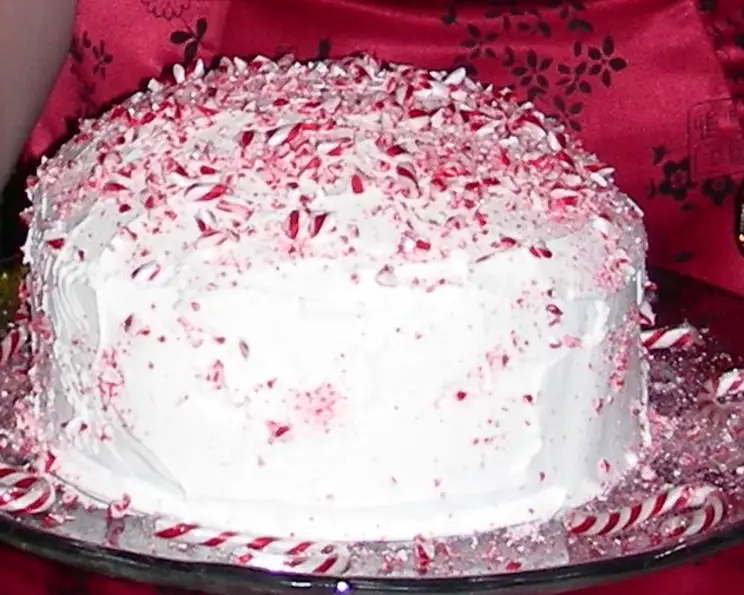
Beyond the taste, the visual appeal is undeniable. The festive colors – the deep chocolate, the pristine white frosting, and the vibrant red and white flecks of crushed candy canes – make it a stunning centerpiece for any holiday table. It's a dessert that tells a story, often one passed down through generations, bringing joy and a sense of tradition to every gathering. And when you can present such a magnificent creation without last-minute stress, its appeal only grows stronger for busy holiday hosts.
Mastering Your Make-Ahead Chocolate Candy Cane Cake Recipe for Stress-Free Holidays
The key to successful holiday entertaining lies in smart planning, and that includes your dessert. A make-ahead strategy for your chocolate candy cane cake recipe is a game-changer, allowing you to focus on your guests instead of being stuck in the kitchen. Here’s how to master it:
Preparing Cake Layers in Advance
One of the biggest time-savers is baking your cake layers ahead of time. Cake layers actually benefit from a bit of resting, often becoming even moister. The recipe provided uses both chocolate cake mix and instant chocolate pudding mix, along with sour cream and vegetable oil, which are all excellent ingredients for ensuring a moist, tender crumb that holds up beautifully to make-ahead prep.
- Bake and Cool Thoroughly: Follow the baking instructions, ensuring the cakes cool completely in their pans for 10 minutes before inverting onto a wire rack. This initial cooling helps prevent breakage. It's absolutely crucial that the cakes are *completely* cooled before wrapping, usually for several hours or overnight.
- Wrap and Freeze: Once fully cooled, tightly wrap each cake layer individually in plastic wrap, then an additional layer of aluminum foil. This dual-layer protection prevents freezer burn and locks in moisture. You can freeze cake layers for up to 2-3 months.
- Thawing: When you're ready to assemble, simply unwrap the frozen layers and let them thaw at room temperature for a few hours, or overnight in the refrigerator. They’ll be as fresh as the day you baked them!
Smart Frosting Choices for Ahead-of-Time Prep
The frosting is where make-ahead considerations become particularly important, especially with the inclusion of candy canes. Our primary recipe calls for Cool Whip, which is convenient and light, but for longer make-ahead periods, other options might be more stable.
- Cool Whip Considerations: While easy to use, Cool Whip is best applied closer to serving time. If you frost with Cool Whip more than 24 hours in advance, especially in a warm environment, it can start to deflate or weep slightly. Always keep a Cool Whip frosted cake refrigerated until serving.
- Buttercream Alternatives: For a more robust, stable make-ahead frosting, consider a chocolate or peppermint buttercream. A classic buttercream made with butter, powdered sugar, and a touch of milk or cream holds up exceptionally well in the refrigerator for 3-4 days. You can make buttercream several days in advance and store it in an airtight container in the fridge; simply bring it to room temperature and re-whip before frosting.
- The Candy Cane Dilemma: This is a critical make-ahead tip! Traditional crushed candy canes, especially those made primarily of sugar, tend to get sticky and melt into the frosting after a day or so, creating a less appealing texture and appearance.
- Solution 1 (Ideal for Make-Ahead): As suggested by experts, swap traditional crushed candy canes for more stable chocolate-mint alternatives like Andes peppermint crunch baking bits or similar chocolate-covered mint pieces. These will maintain their texture and integrity in your frosting for days.
- Solution 2 (For Last-Minute Garnish): If you truly love the authentic candy cane crunch, reserve all crushed candy canes and only sprinkle them over the frosted cake just before serving. This way, you get the fresh crunch and vibrant look without the stickiness.
Assembling and Storing Your Festive Masterpiece
Once your components are ready, assembly is the fun part! For the best make-ahead results, consider assembling your Easy Chocolate Candy Cane Cake: Your Festive Holiday Dessert the day before or the morning of your event.
- Chill Between Steps: If using a softer frosting like Cool Whip, refrigerate the cake briefly (15-20 minutes) after spreading the first layer of Cool Whip between the cake layers. This helps firm it up before adding the top layer and final frosting.
- Refrigeration is Key: An assembled cake, especially one with dairy-based frosting, should be stored in the refrigerator. Cover it loosely with plastic wrap or a cake dome to prevent it from absorbing refrigerator odors and drying out.
- Bring to Room Temperature (Optional): For buttercream-frosted cakes, allowing the cake to sit at room temperature for 30-60 minutes before serving can enhance the flavor and soften the frosting to a more enjoyable texture. Cool Whip cakes are generally best served chilled.
Elevating Your Chocolate Candy Cane Cake: Tips & Tricks
While the base chocolate candy cane cake recipe is fantastic, a few extra touches can take it from great to extraordinary.
- Boost the Chocolate Factor: For an even richer chocolate experience, consider adding 1/4 cup of unsweetened cocoa powder to your cake batter, as suggested in the reference. You could also use dark chocolate baking squares instead of semi-sweet for a deeper flavor profile. A teaspoon of instant espresso powder can also subtly deepen chocolate notes without adding a coffee flavor.
- Enhance Moistness: The combination of pudding mix, sour cream, and vegetable oil already creates a wonderfully moist cake. Ensure you don't overmix the batter; mix until just combined on low speed, then beat for two minutes on medium. Overmixing can develop the gluten too much, leading to a tougher cake.
- Perfect Peppermint Balance: If you're using peppermint extract in your frosting or batter (in addition to, or instead of, crushed candy canes), start with a small amount (1/4 to 1/2 teaspoon) and taste as you go. Peppermint can be quite potent!
- Creative Garnishes: Beyond crushed candy canes, consider chocolate curls, mini candy canes placed around the base or on top, a drizzle of white chocolate ganache, or even a few fresh mint leaves for an elegant touch. For a twist on tradition, revisit Grandma's Holiday Chocolate Peppermint Cake Recipe: A Sweet Tradition for more inspiration on how to make this cake uniquely yours.
Your Go-To Holiday Chocolate Candy Cane Cake Recipe: A Step-by-Step Guide
This recipe provides delicious results with minimal fuss, making it perfect for holiday preparation.
Yields: 1 cake (18 slices)
Prep Time: 20 minutes
Cook Time: 50-60 minutes
Total Time: 1 hour 20 minutes (plus cooling and chilling)
Ingredients:
- 1 (18 ounce) package chocolate cake mix (for 2 layers)
- 1 (42 g) package instant chocolate pudding mix (for 4 portions)
- 4 large eggs
- 1 cup sour cream
- 1/2 cup vegetable oil
- 1/2 cup water
- 4 semi-sweet chocolate baking squares, chopped (about 1/2 cup)
- 1 cup candy canes, crushed (plus more for garnish, or use peppermint baking bits)
- 3 cups Cool Whip (or your preferred stable frosting)
Equipment:
- Two 9-inch round cake pans
- Electric mixer
- Large mixing bowl
- Measuring cups and spoons
- Wire rack
Instructions:
- Prepare Oven and Pans: Preheat your oven to 350°F (175°C) with the oven rack positioned in the center. Grease two 9-inch round cake pans thoroughly with shortening or butter, then lightly flour them, tapping out any excess. This prevents sticking.
- Combine Wet and Dry Ingredients: In a large bowl, combine the chocolate cake mix, instant chocolate pudding mix, eggs, sour cream, vegetable oil, and water.
- Mix Batter: Using an electric mixer on low speed, beat the ingredients until just moistened, about 30 seconds. Do not overmix at this stage; overmixing can lead to a dense or tough cake. Increase the mixer speed to medium and beat for 2 minutes until the batter is smooth and well blended.
- Add Flavor Enhancers: Gently stir in the chopped semi-sweet chocolate and about 2 tablespoons of the crushed candy canes (or peppermint baking bits if making ahead). Reserve the remaining crushed candy canes for garnishing just before serving.
- Bake the Layers: Spoon the batter evenly into your prepared cake pans. Bake for 50 minutes to 1 hour, or until a toothpick inserted into the center of the cakes comes out clean. If the tops begin to brown too quickly, you can loosely tent them with aluminum foil.
- Cool the Cakes: Allow the cakes to cool in their pans for 10 minutes. This allows them to firm up slightly. Then, carefully invert the cakes onto a wire rack to cool completely. This step is critical; frosting warm cake will cause your Cool Whip to melt.
- Assemble the Cake: Once the cake layers are completely cooled, place one layer onto your chosen serving plate. Spread evenly with 1 cup of Cool Whip. Gently top with the second cake layer.
- Frost and Garnish: Frost the entire cake with the remaining Cool Whip. For a fresh crunch and vibrant look, garnish generously with the reserved crushed candy canes just before serving. If you used peppermint baking bits in the frosting, you can add more to the top for extra crunch.
- Chill Before Serving: Refrigerate the assembled cake for at least 30 minutes to allow the frosting to set. This also helps meld the flavors.
Conclusion
The chocolate candy cane cake recipe is more than just a dessert; it's an edible emblem of holiday joy, a delightful fusion of rich chocolate and vibrant peppermint that promises to enchant your guests. By embracing these make-ahead tips, you can transform holiday entertaining from a last-minute rush into a relaxed, joyful experience. Imagine the delight on your loved ones' faces as they savor this festive treat, knowing you crafted it with care and foresight. So, go ahead, make this delicious tradition your own, and savor every moment of a truly stress-free holiday season.
